Congrats!! You've officially survived the Craigslist hunt of your nightmares and found the Renter's Paradise that you dreamed of!!! It has all of the 'majors' – a dishwasher (um, WHAT!?), those to-die-for built-ins, and the right number of bedrooms with proper adult-sized-ish closets. Soon after you sign your lease, you move in and discover ALL OF THOSE annoying details that actually grind your gears every single day!! Hark – I come bearing good news!
Most people don't realize that you don't have to live with everything that you hate about your rental. I'm here to share a few of my favorite tricks & quick fixes that will make all of your renter's nightmares evaporate into thin air – kiiiinda like last week's stash of Halloween candy. OOPS.
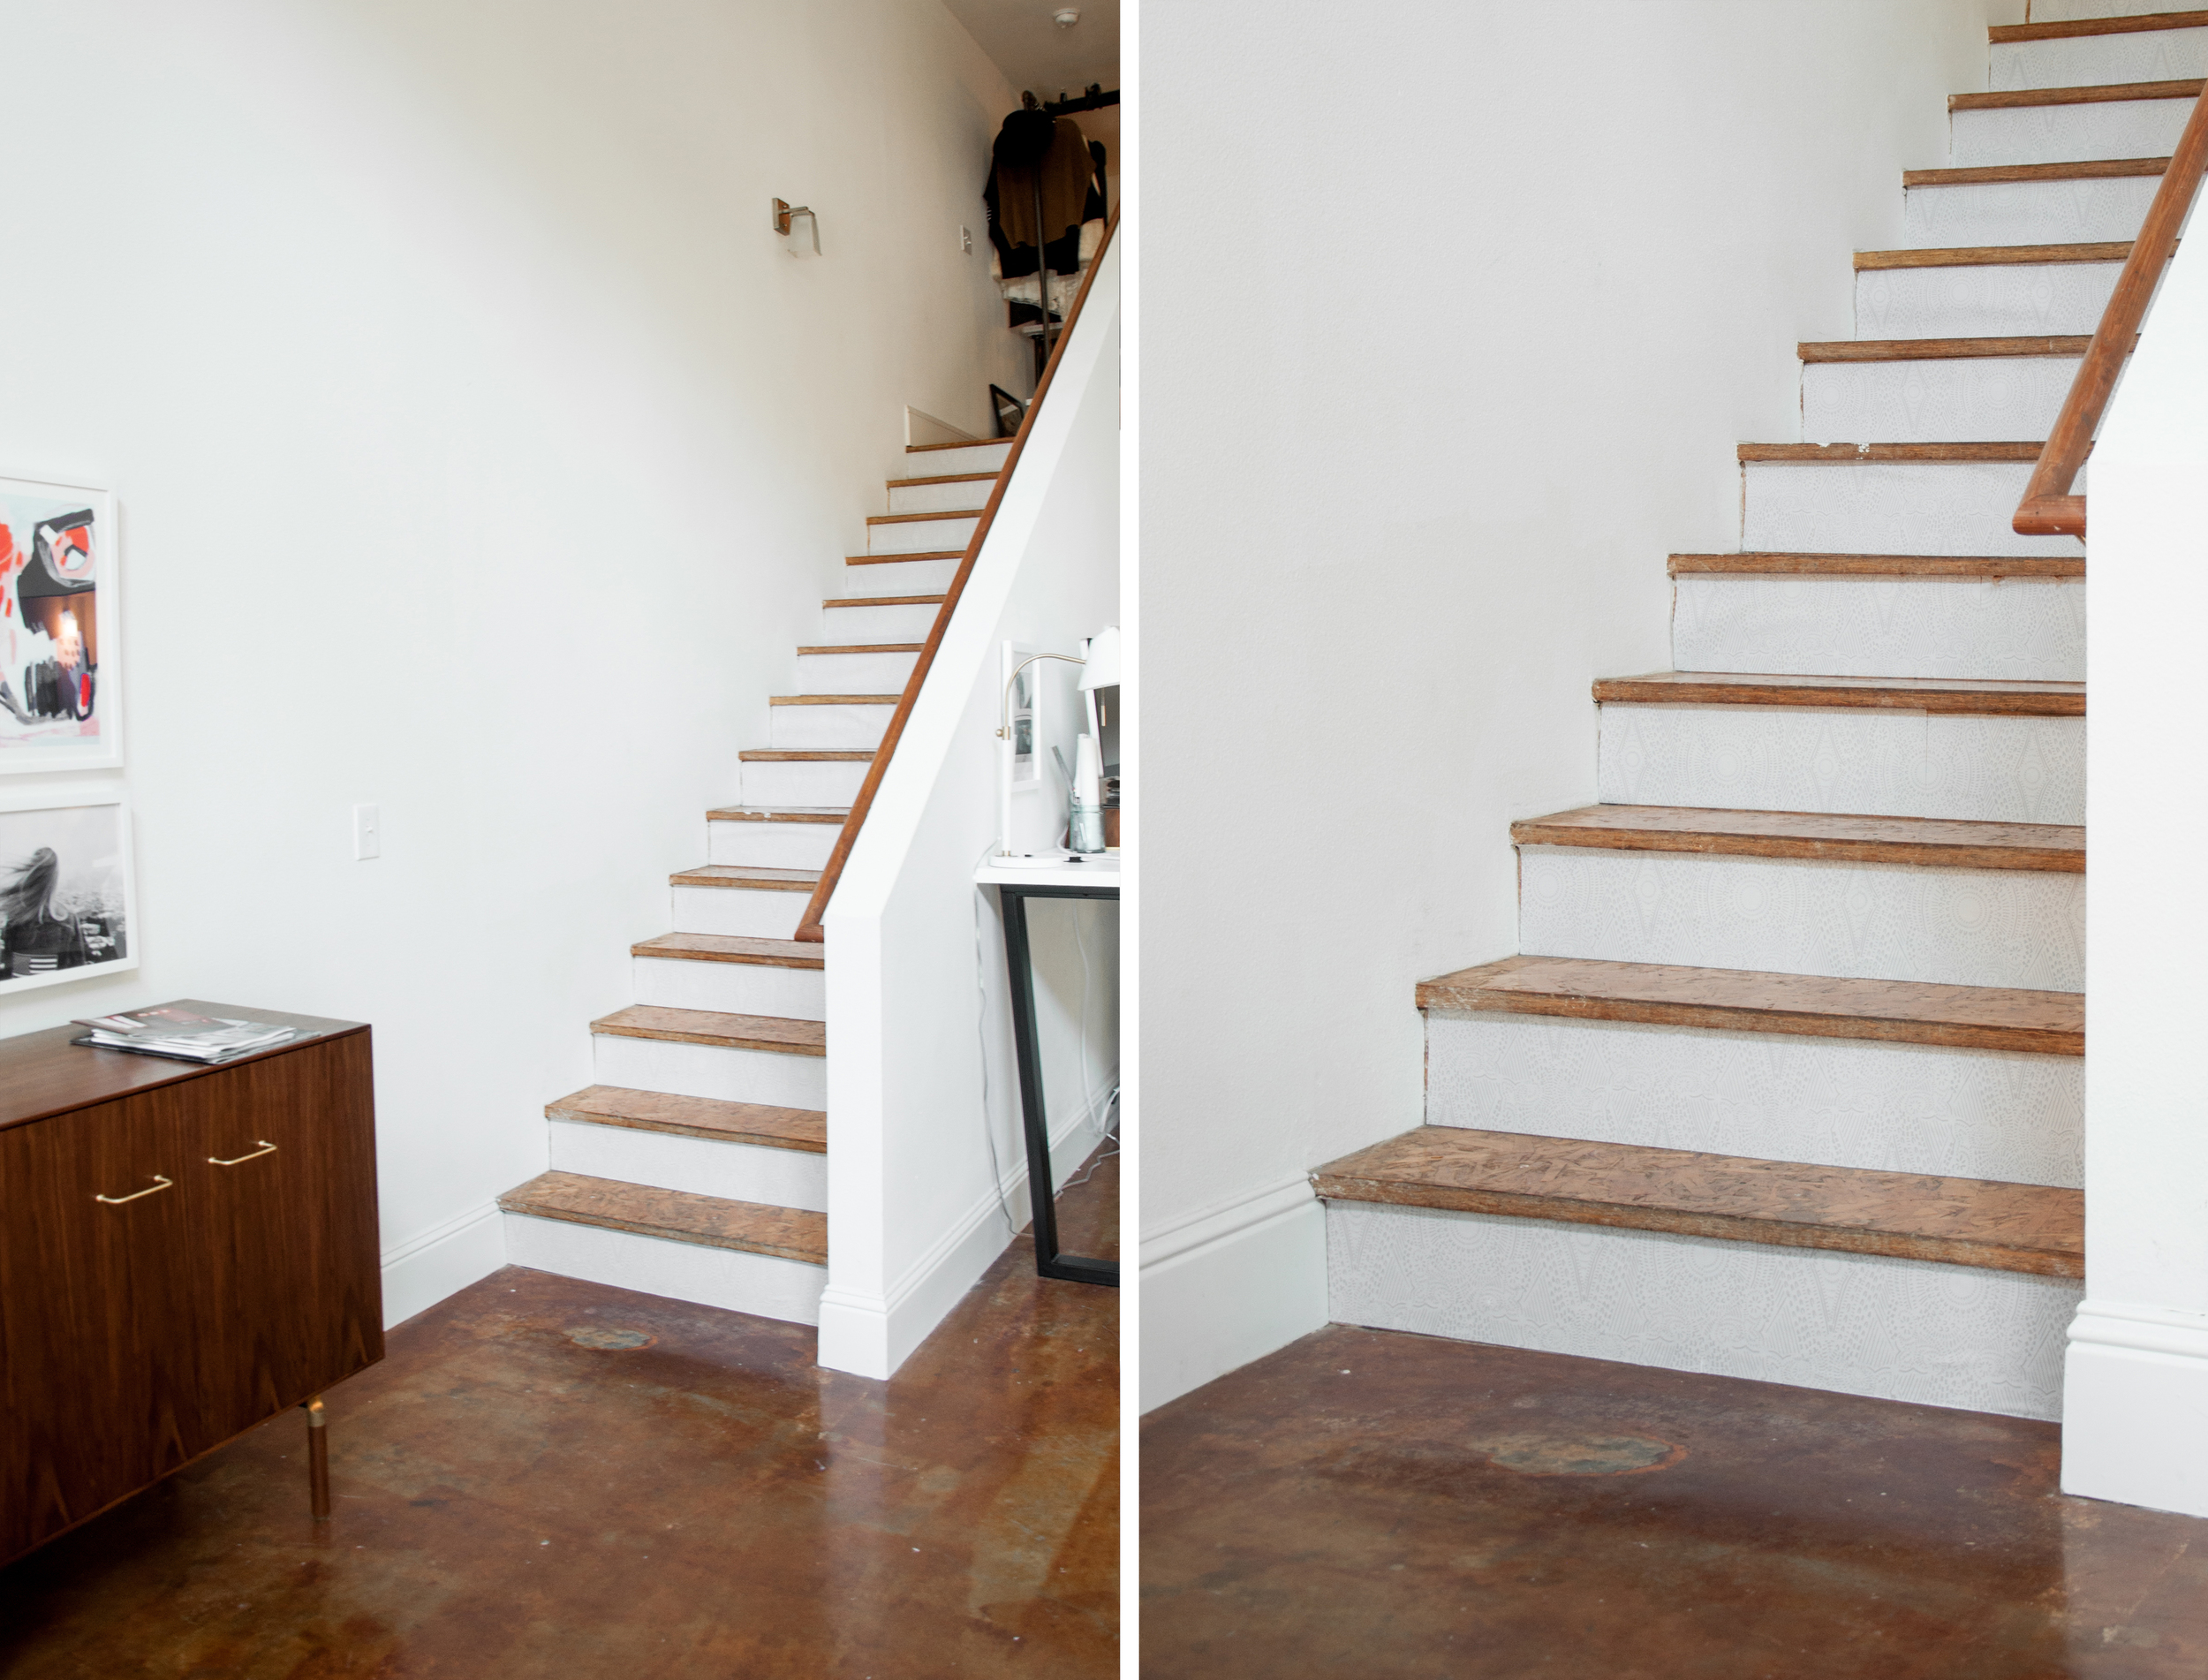
The first installment in my new 'Renter's Woes' series involves an easy makeover for wooden stairs – correction: REALLY-REALLY-UGLY wooden stairs, like mine. When we moved into our Loft, I sat around for months hating every single trip upstairs. Oh trust me, I almost broke down and painted those suckers on multiple occasions. If you live in a renter's market like mine, though, you're probably not willing to forfeit that absurd security deposit. Thankfully, I recently discovered an amazing and truly magical product and I decided to use it to solve my Heinous Staircase Dilemma.
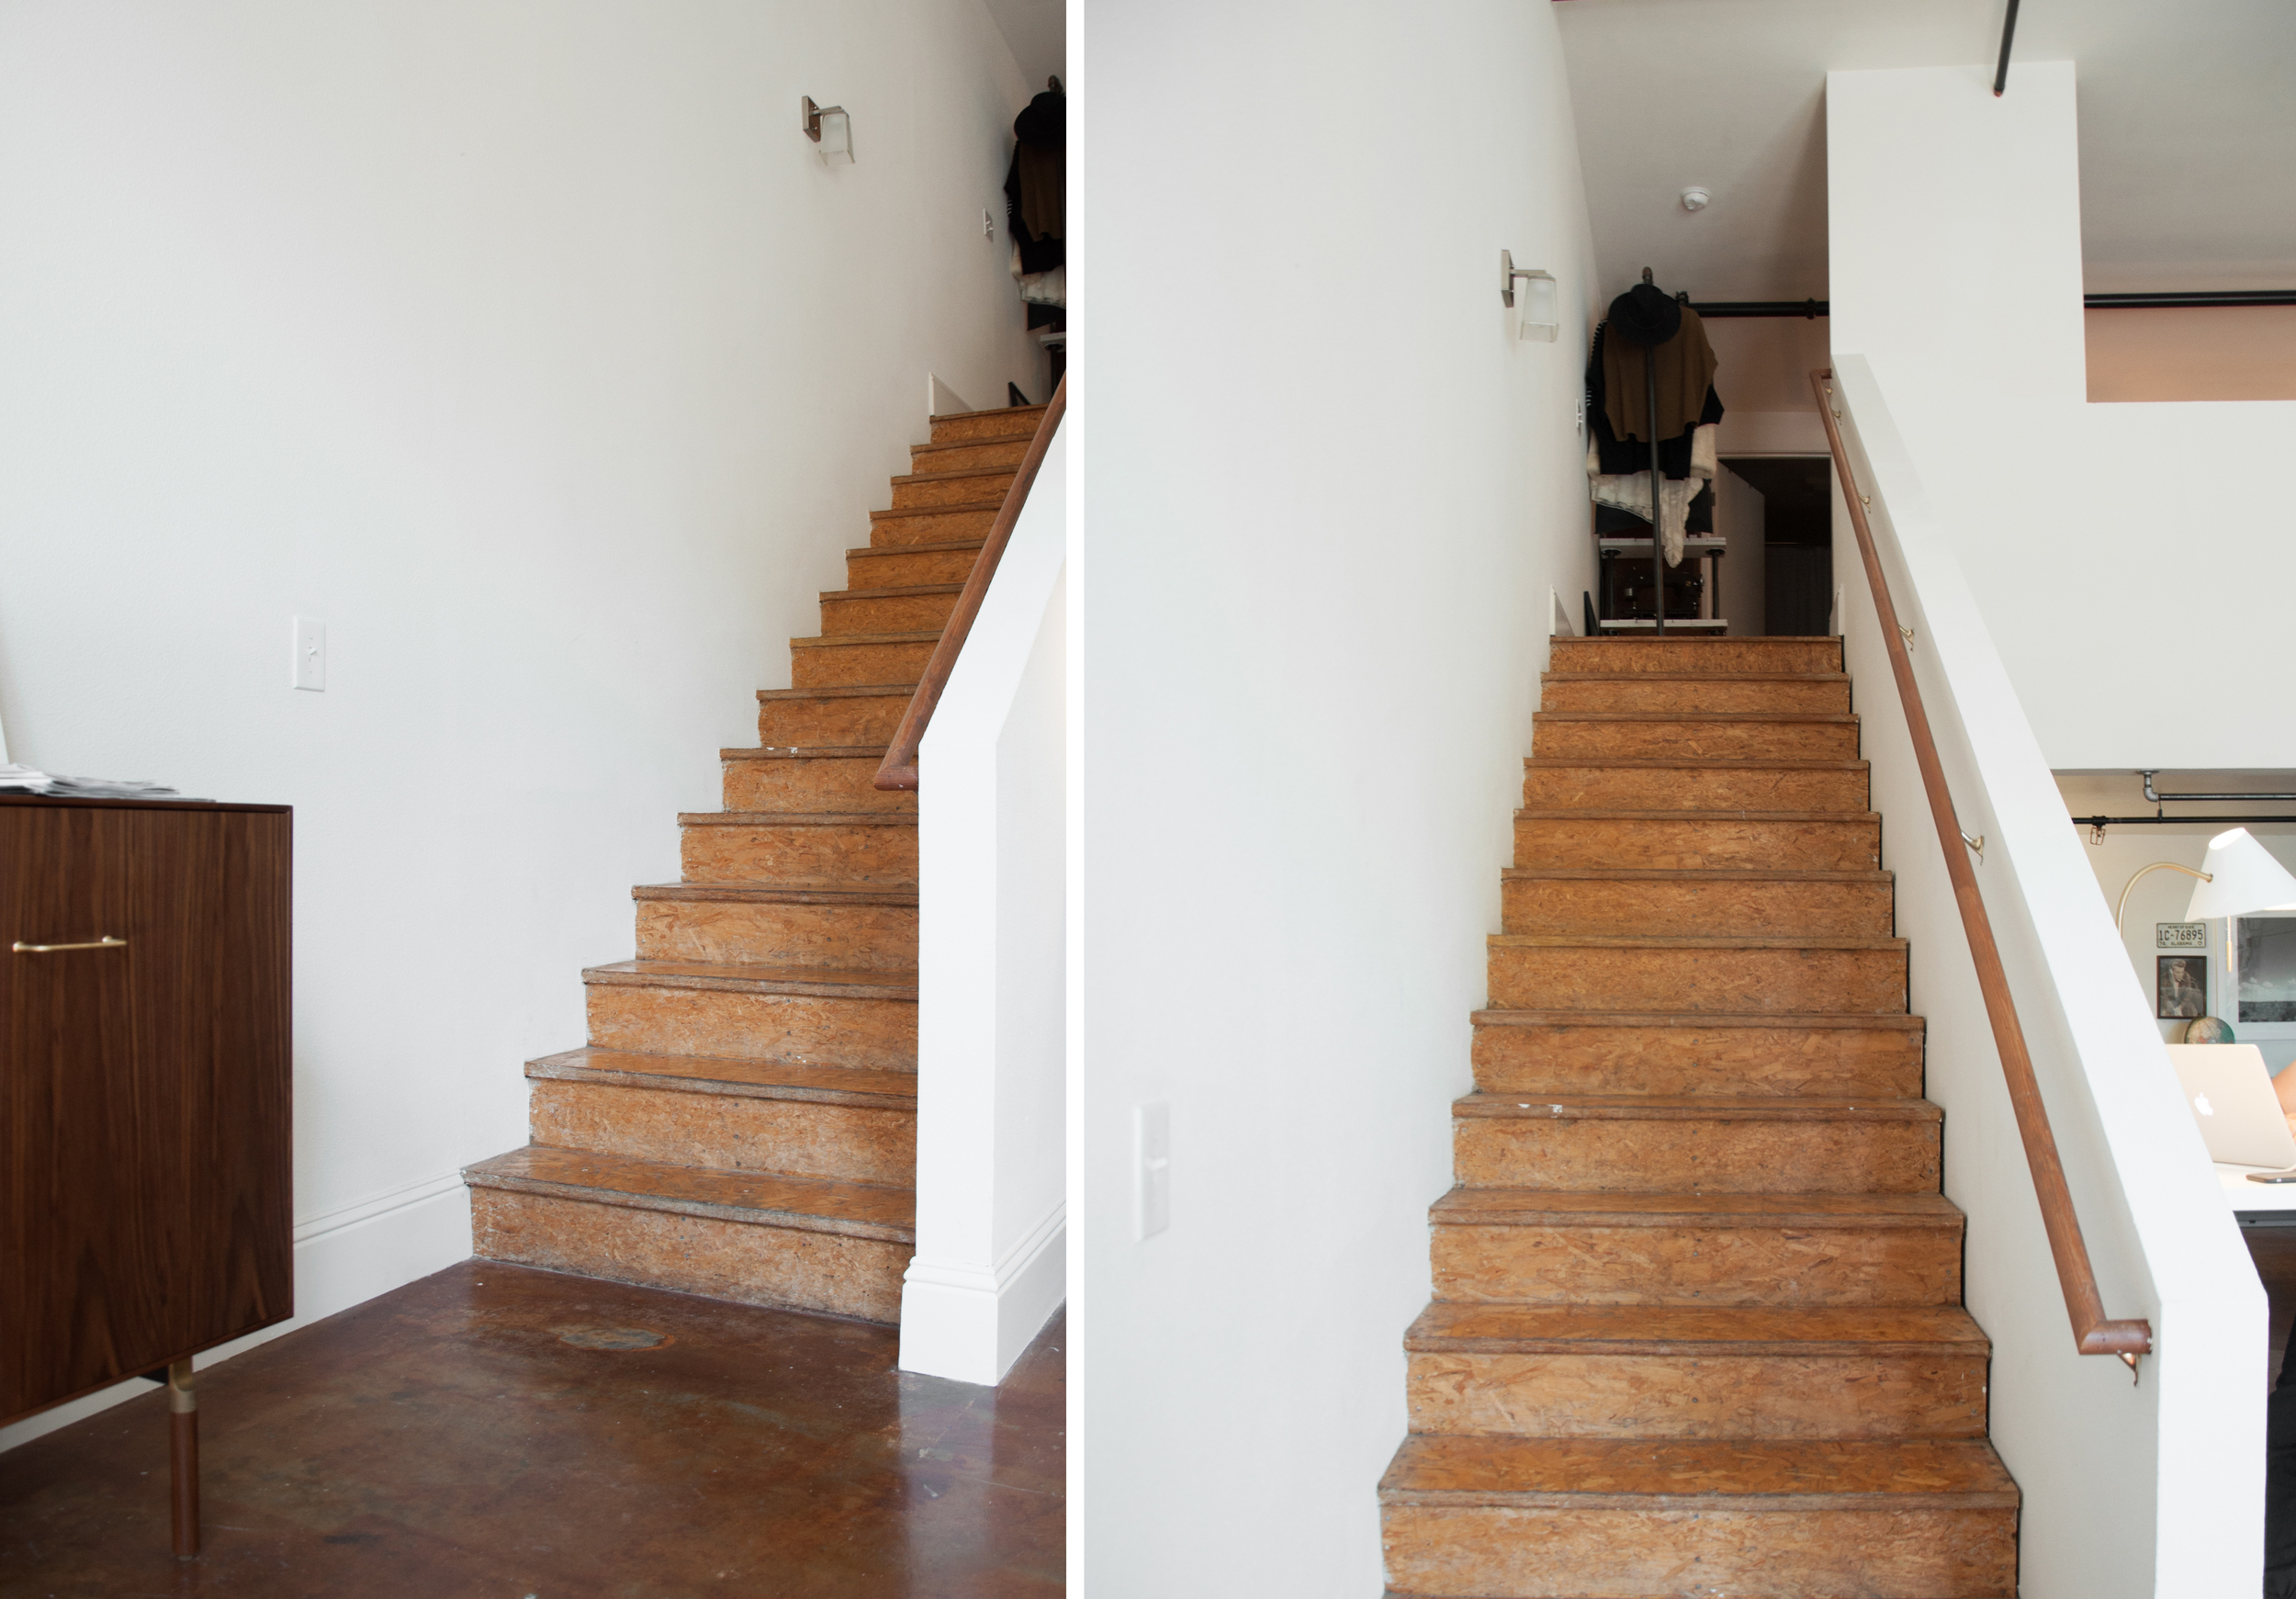
See what I mean? All that awful wooden-chip subfloor nonsense is just too much. The magical product that I discovered is Hygge & West's Removable Wallcovering Tiles. Hey Renter's, your keyword here is re-move-able....MAGIC! You can slap these babies on your eyesore of a staircase in a few easy steps, and easily take 'em off before you move out. I'm about to show you how...
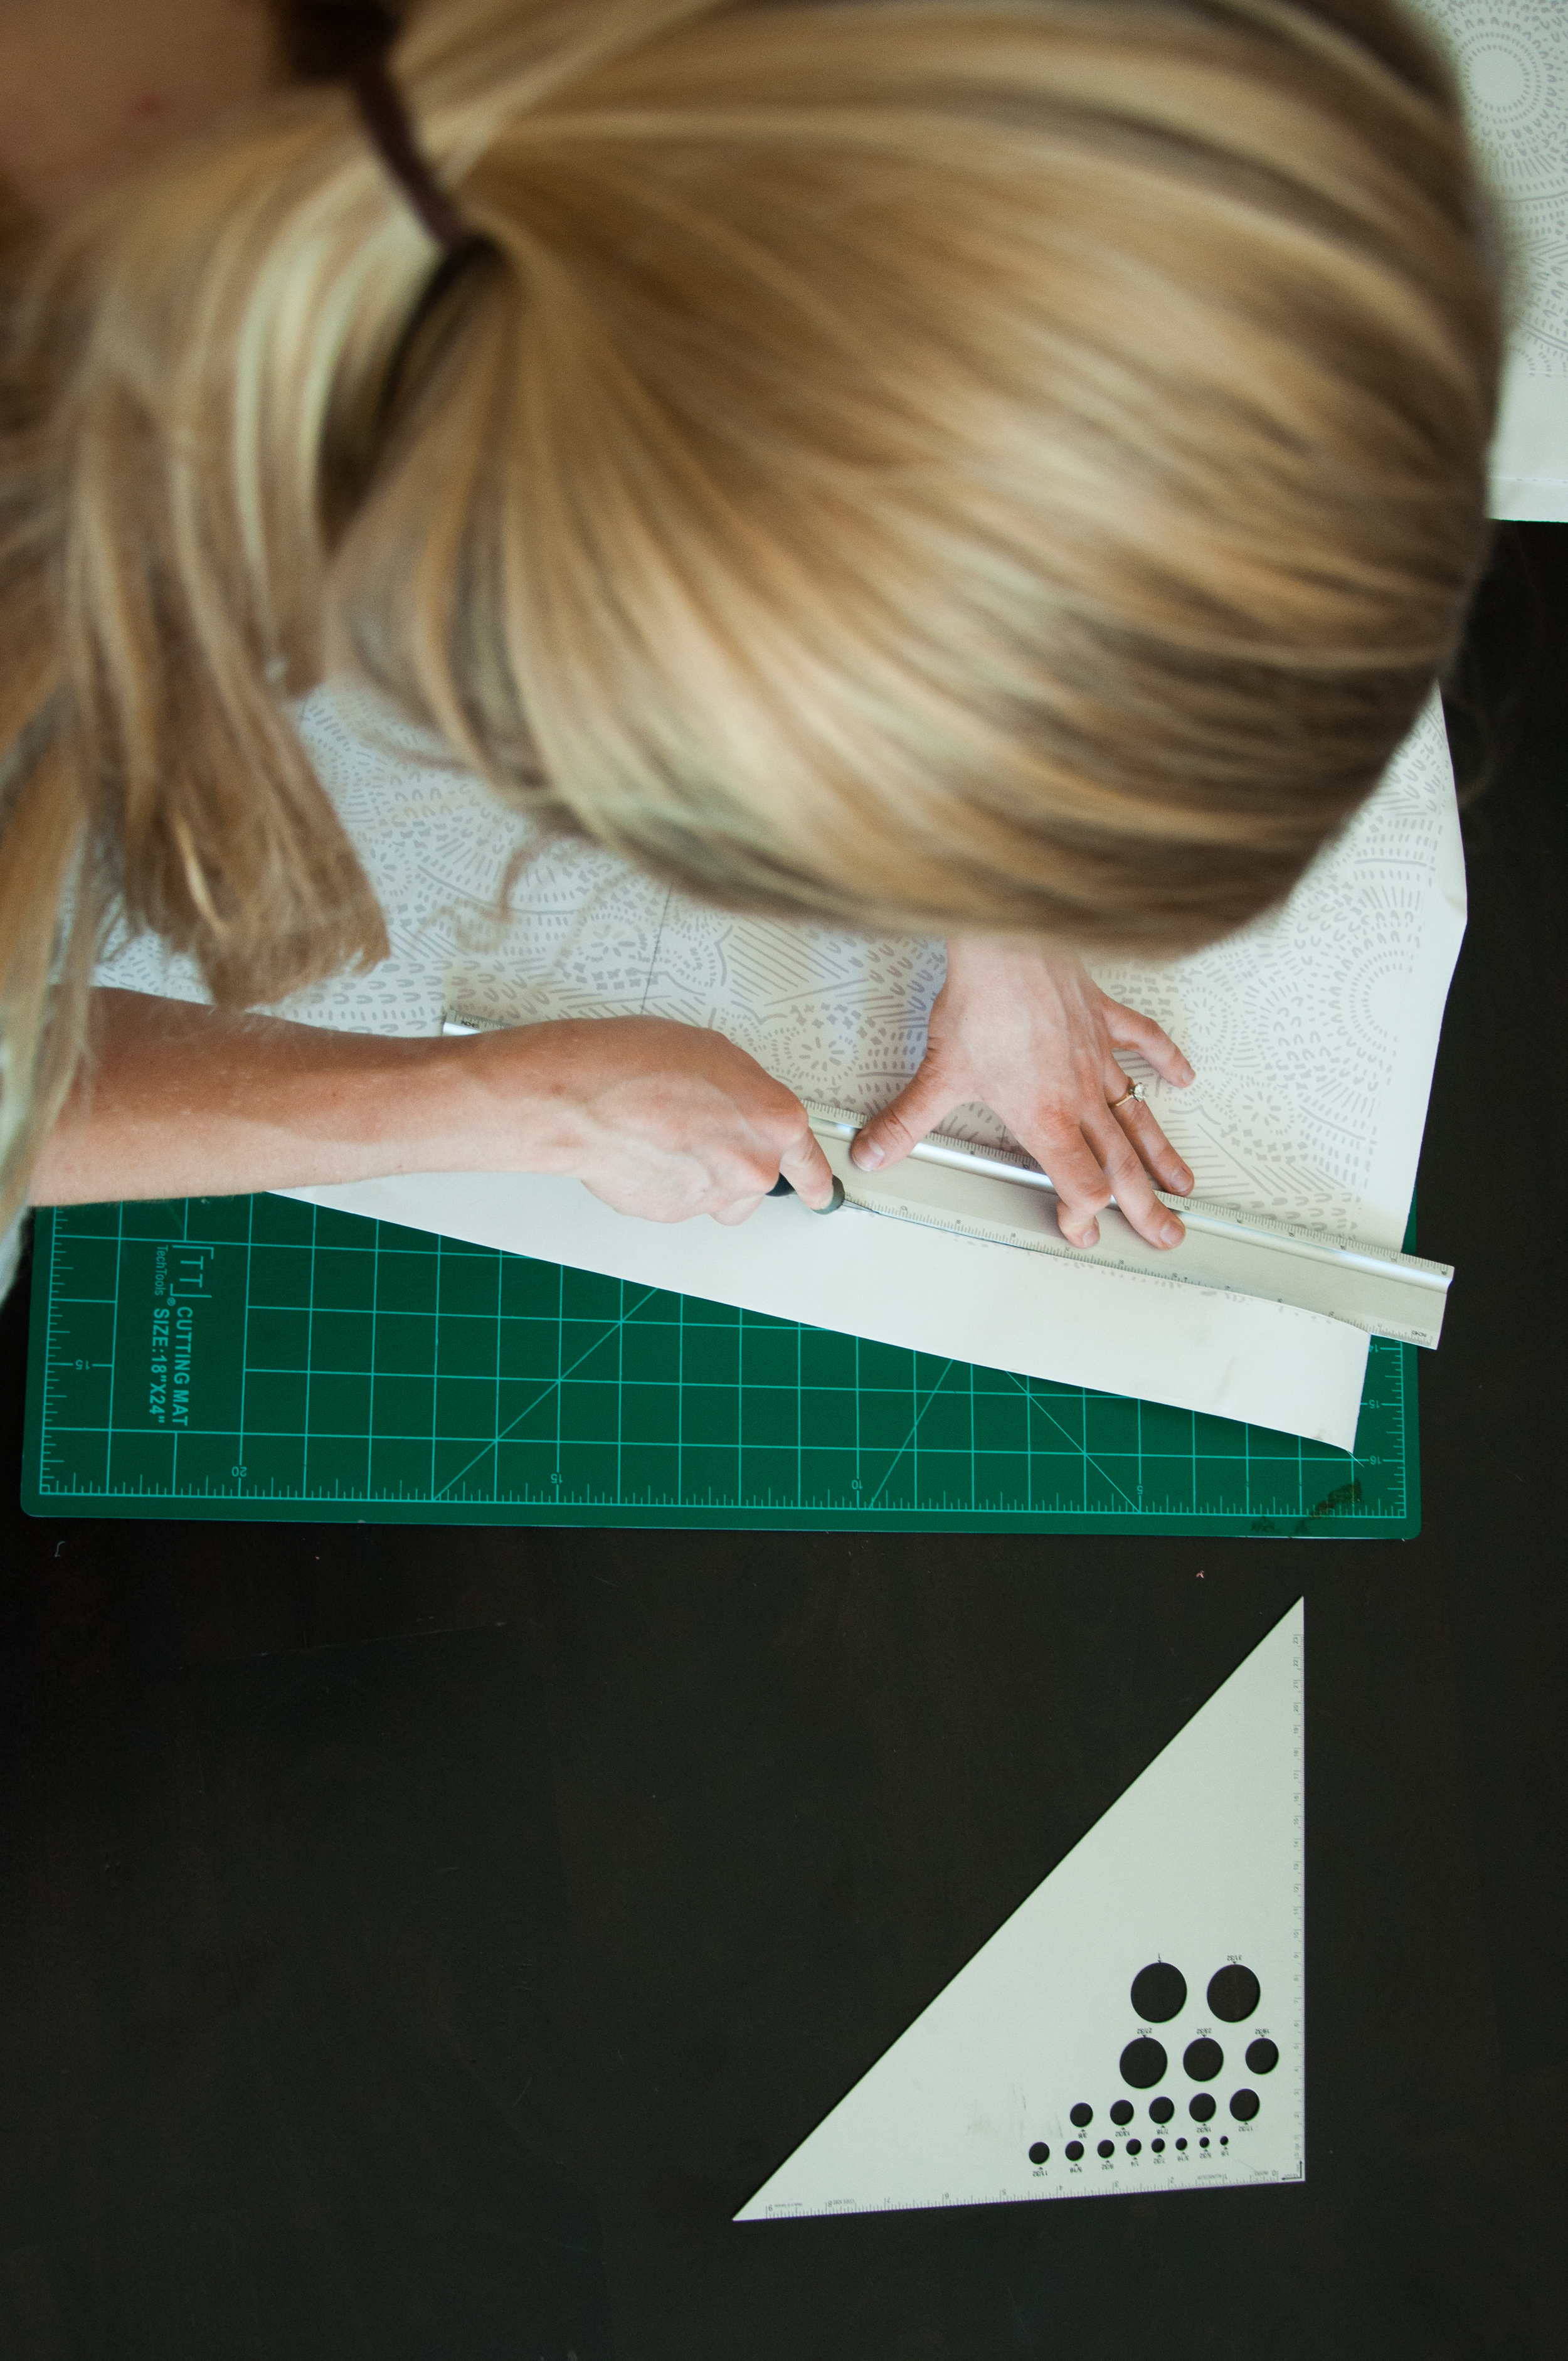
Step 1: You're Really Gonna Need A Template. Nobody wants to sit there and hand-measure wallcovering for each and every riser. A standard template, cut to the size of your riser, will make all of this a lot easier. Tip: the riser is the 'front part' of the stair and will typically be around 7" high x 30-36" wide, but I'd pull an exact measurement using a tape measure.
- Measure your stair riser. I guarantee that there will be one or two stubborn risers that are a little off in size. That's okay – we'll fix it later.
- Grab a piece of cardboard. I used the hardback of a large-scale drawing pad. Shoot for a denser material – it'll make things easier when we get to the cutting process.
- Cut the cardboard to the size of your riser. Depending on the width of your stairs and the size of the wallcovering tile you're using, you might need two pieces of wallcovering per riser. This was the case for my stairs, so my template was actually cut to fit 1/2 of my riser.
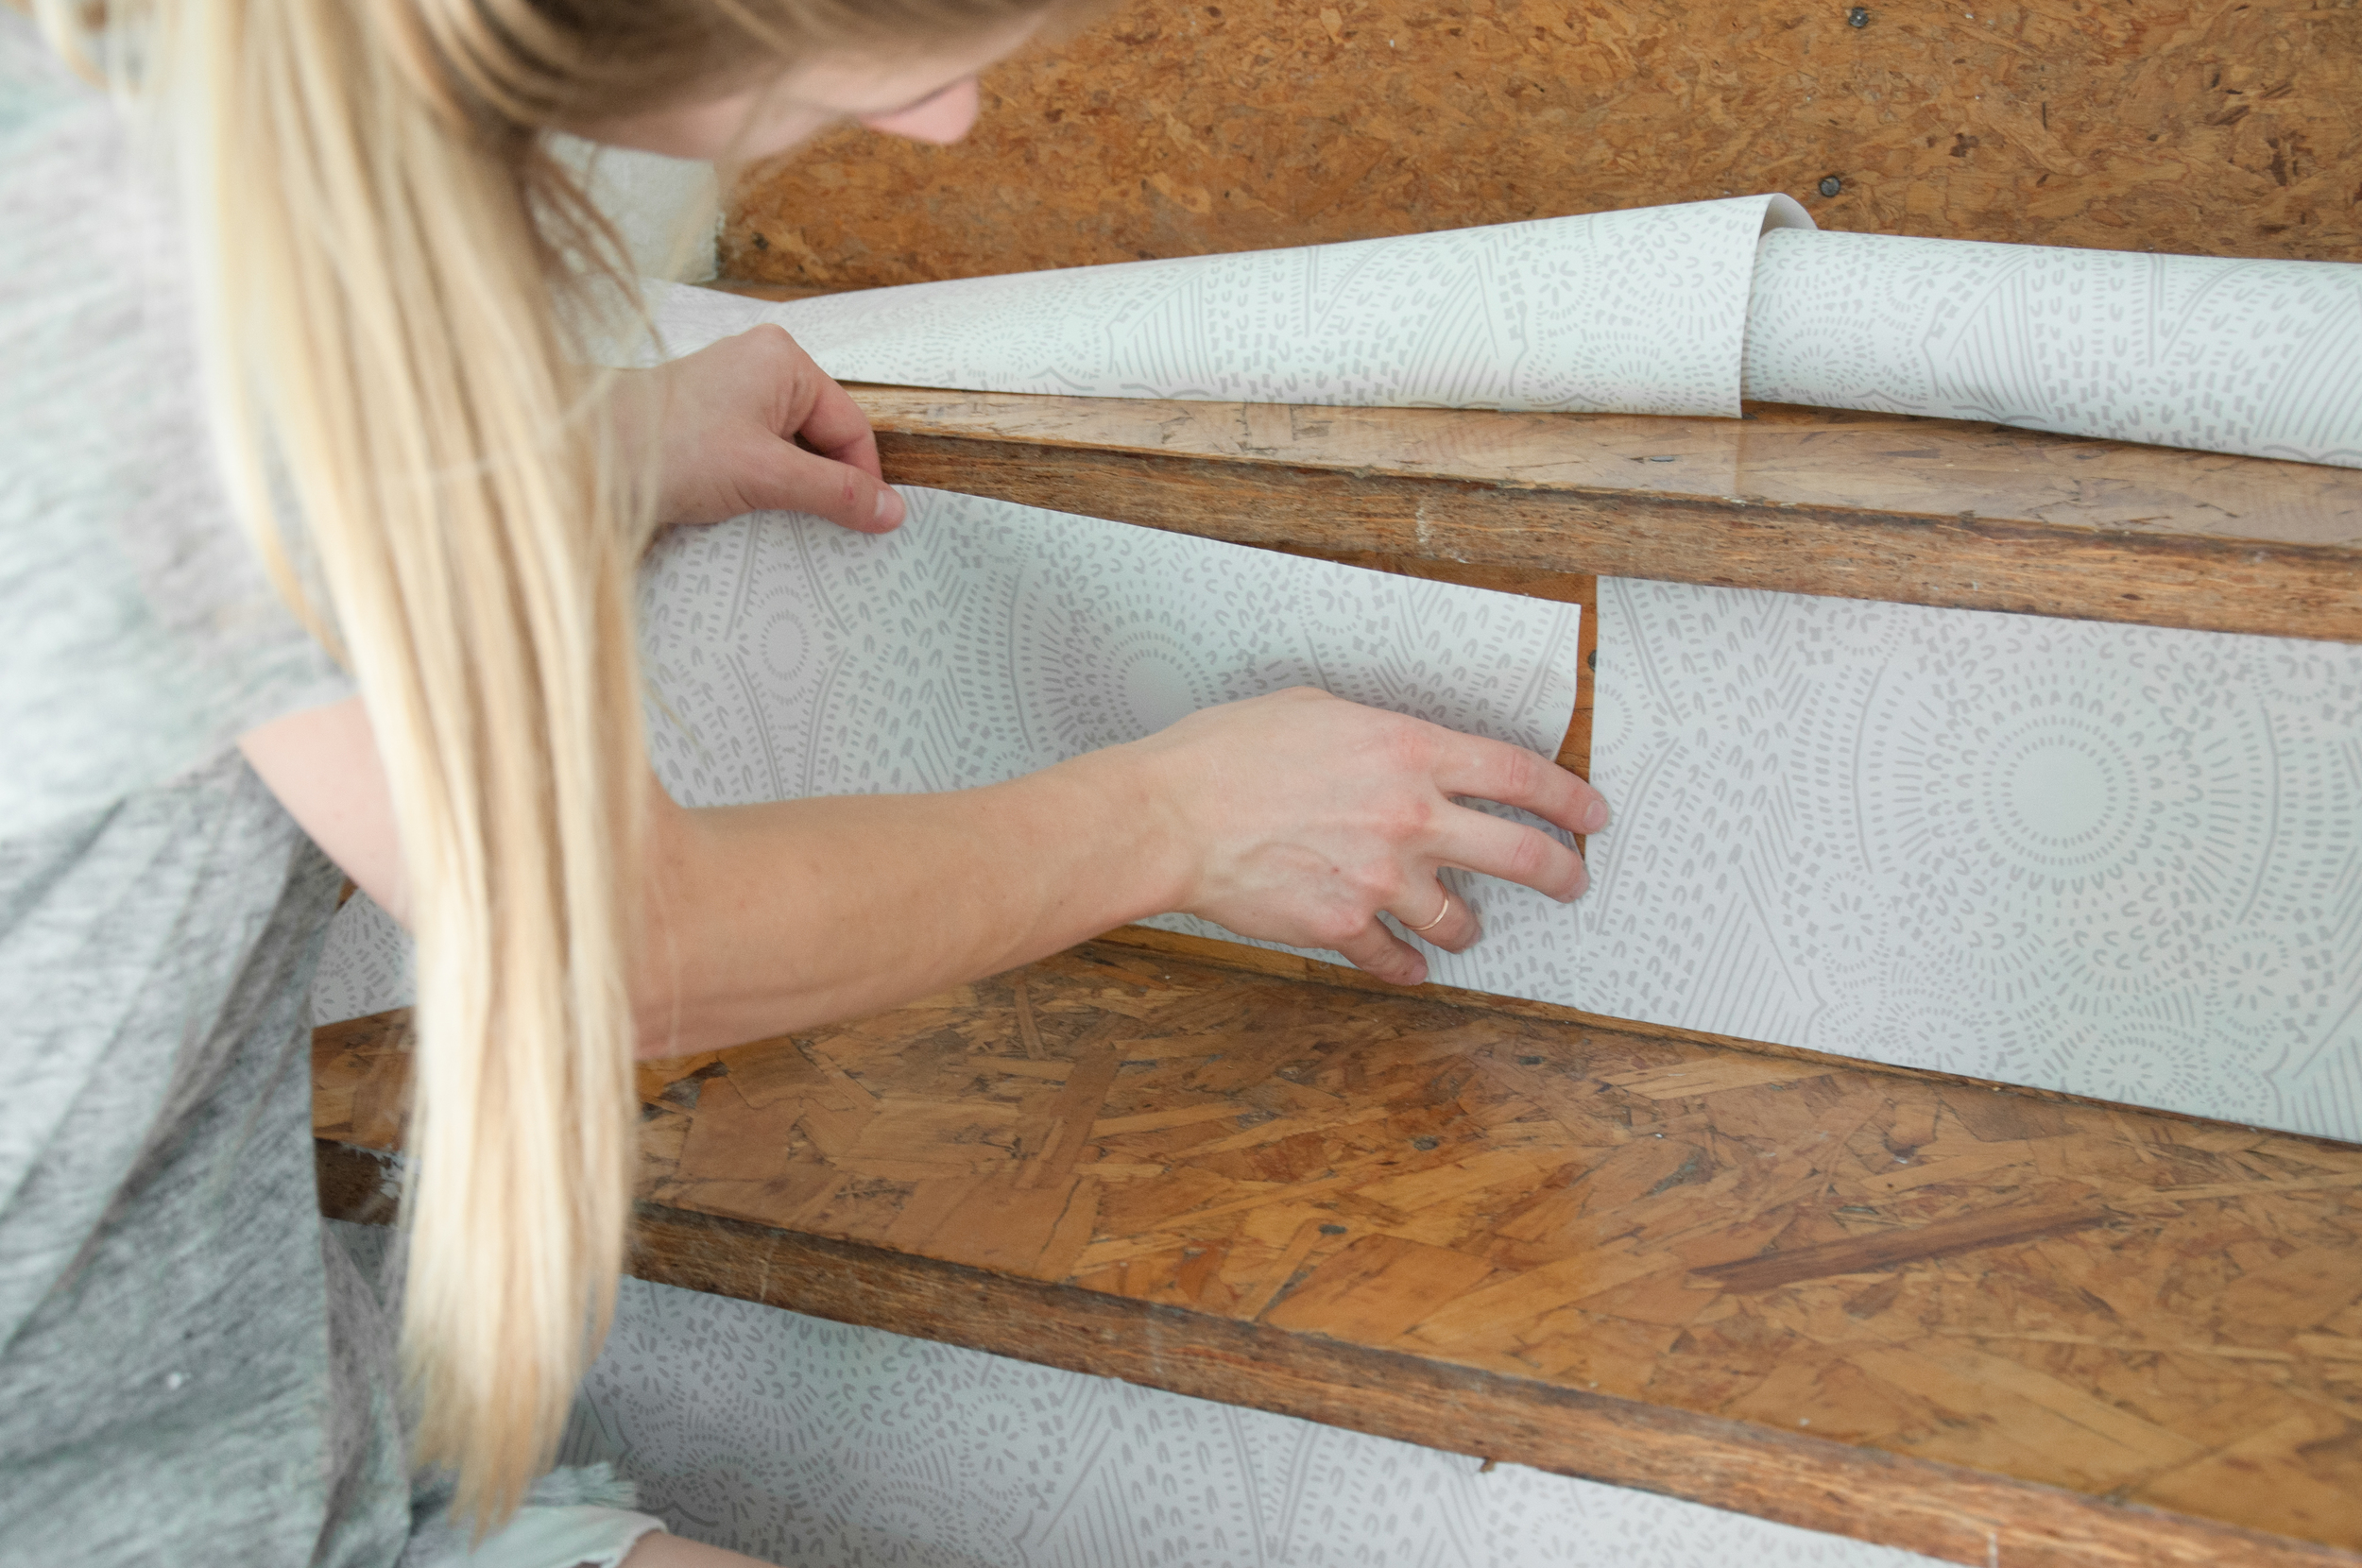
Step 2: Trace & Cut Your Wallcovering
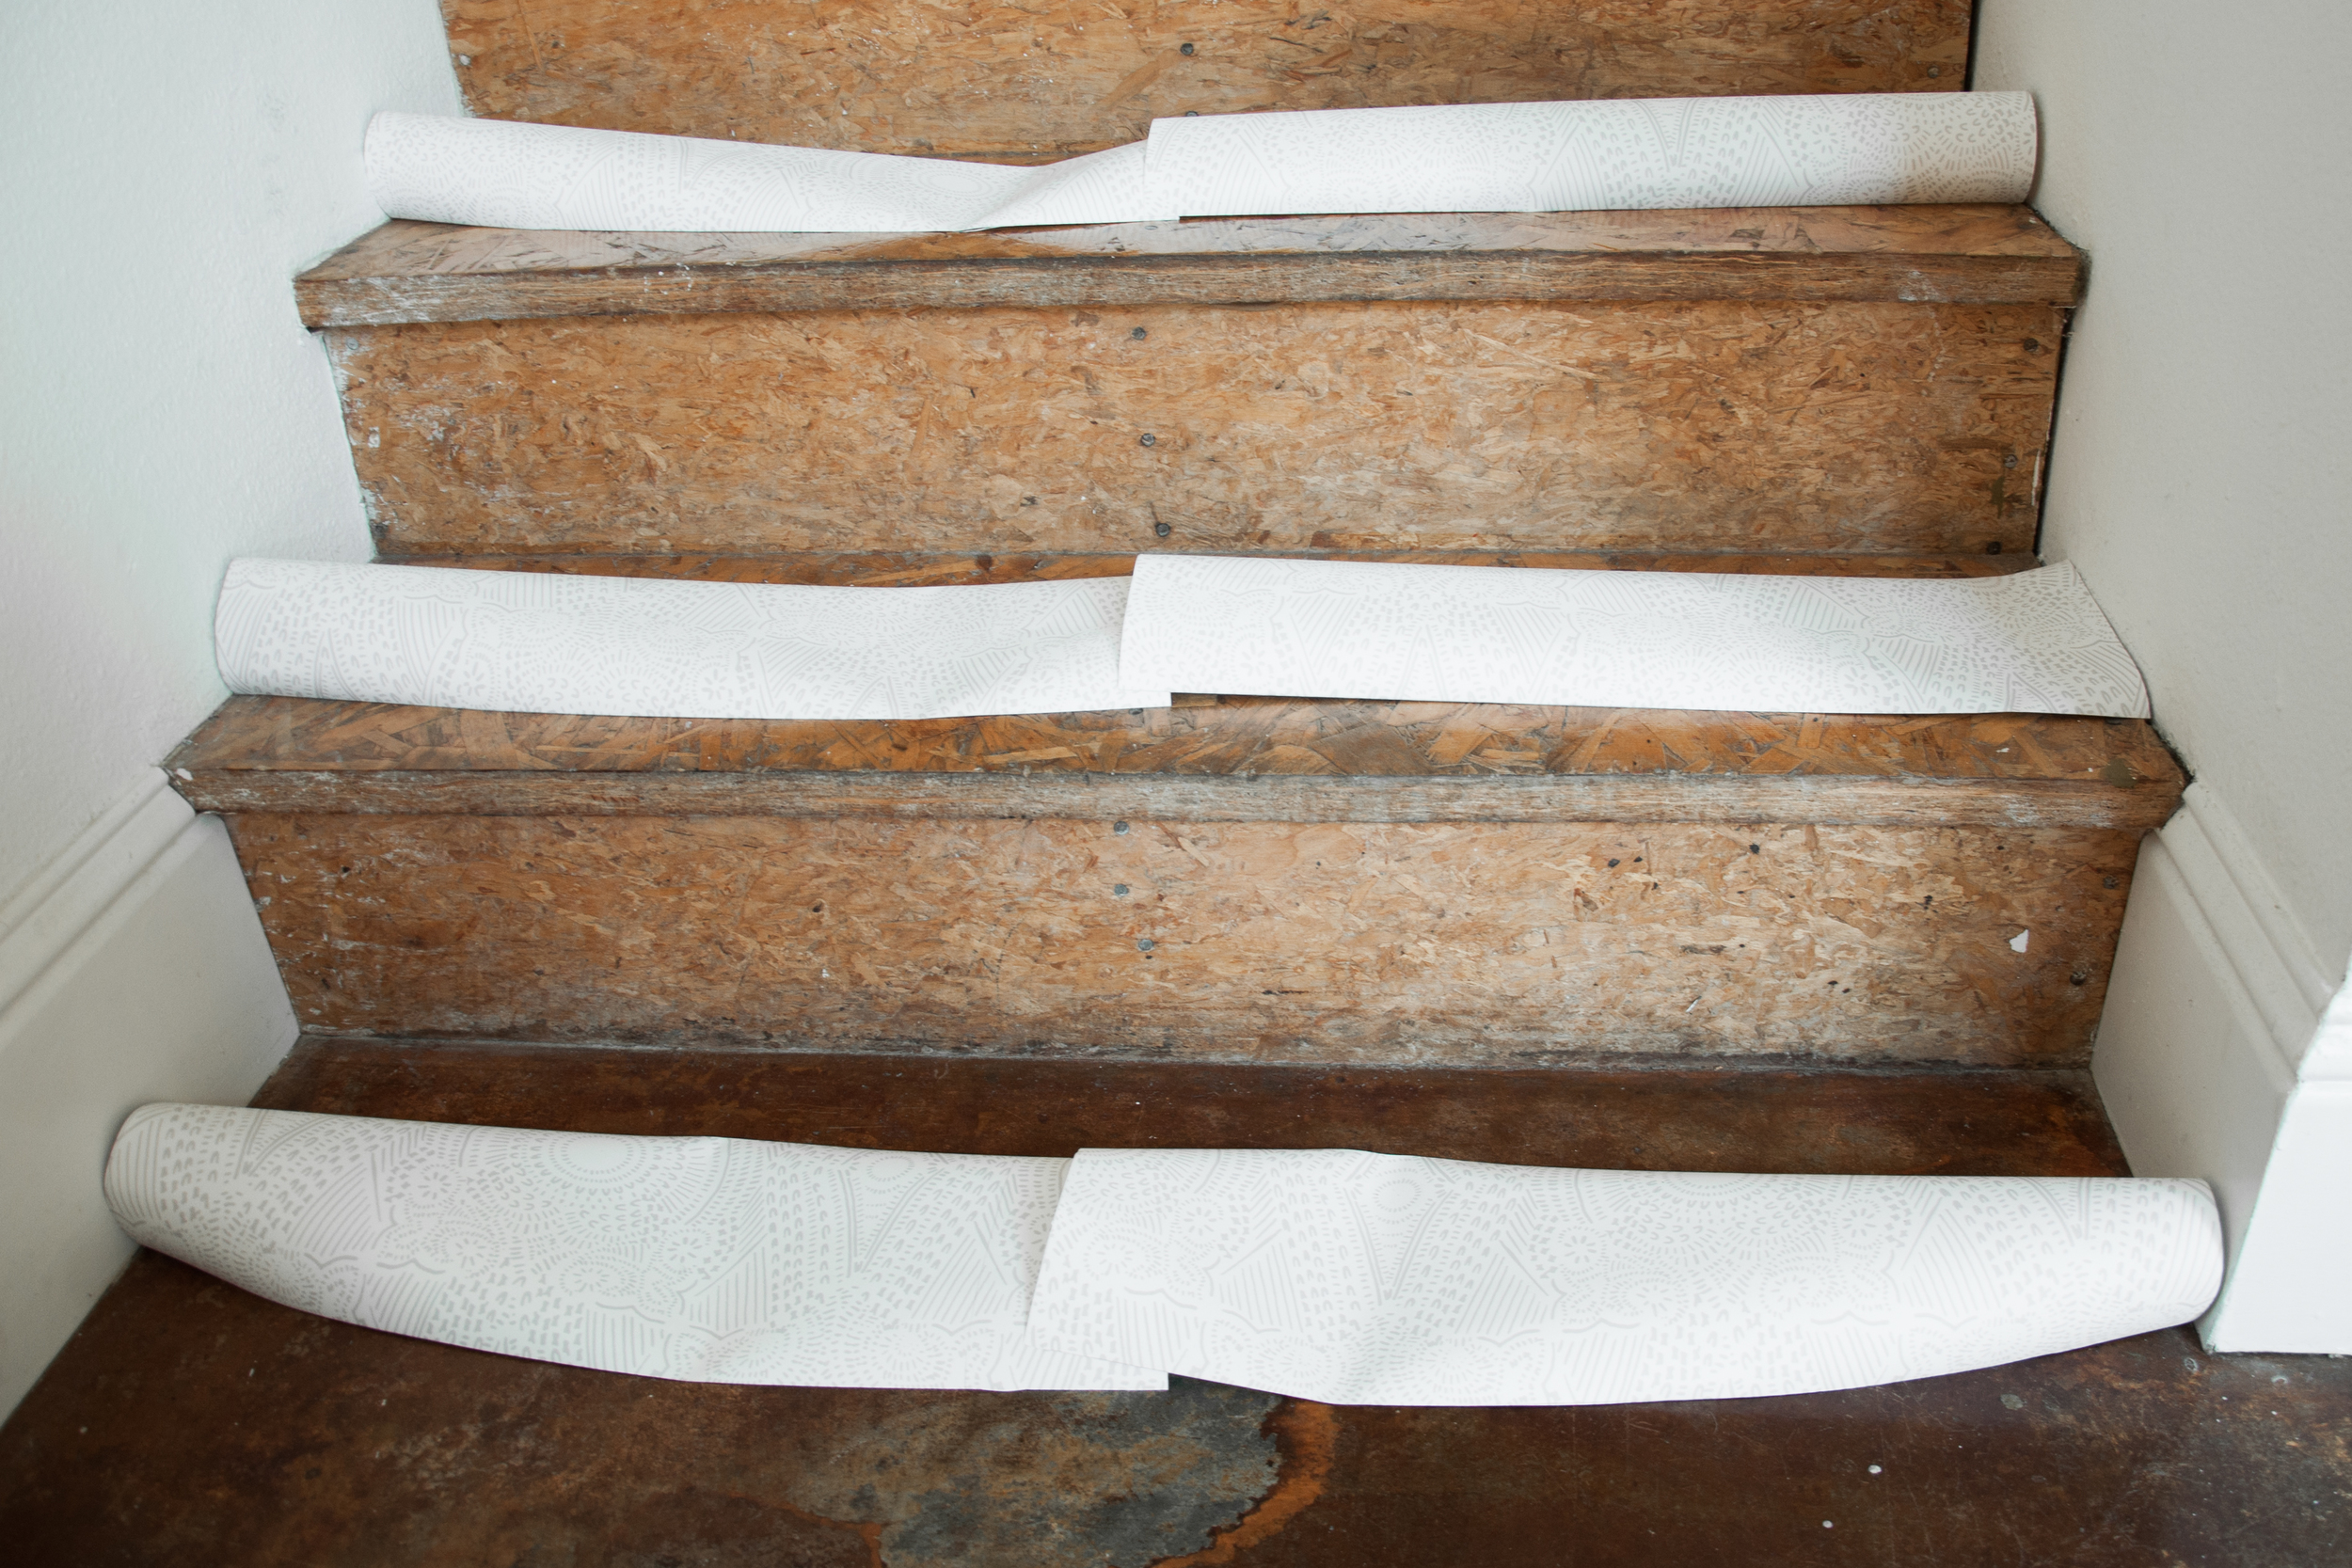
- Place the template over the wallcovering tile, and trace a piece for each riser.
- Remember, if you're using two pieces of wallcovering per riser, I'd recommend matching the pattern in the center. It can get a little tricky when you start cutting, but just pace yourself and lay the pieces out on the floor.
- Use a cutting mat and an x-acto blade, and carefully cut your wallcovering along the lines that you've drawn. This is the part where I'd be EXTRA careful. These wallcovering tiles aren't cheap, and you really don't want to mess this up.


Step 3: Get Ready For Install
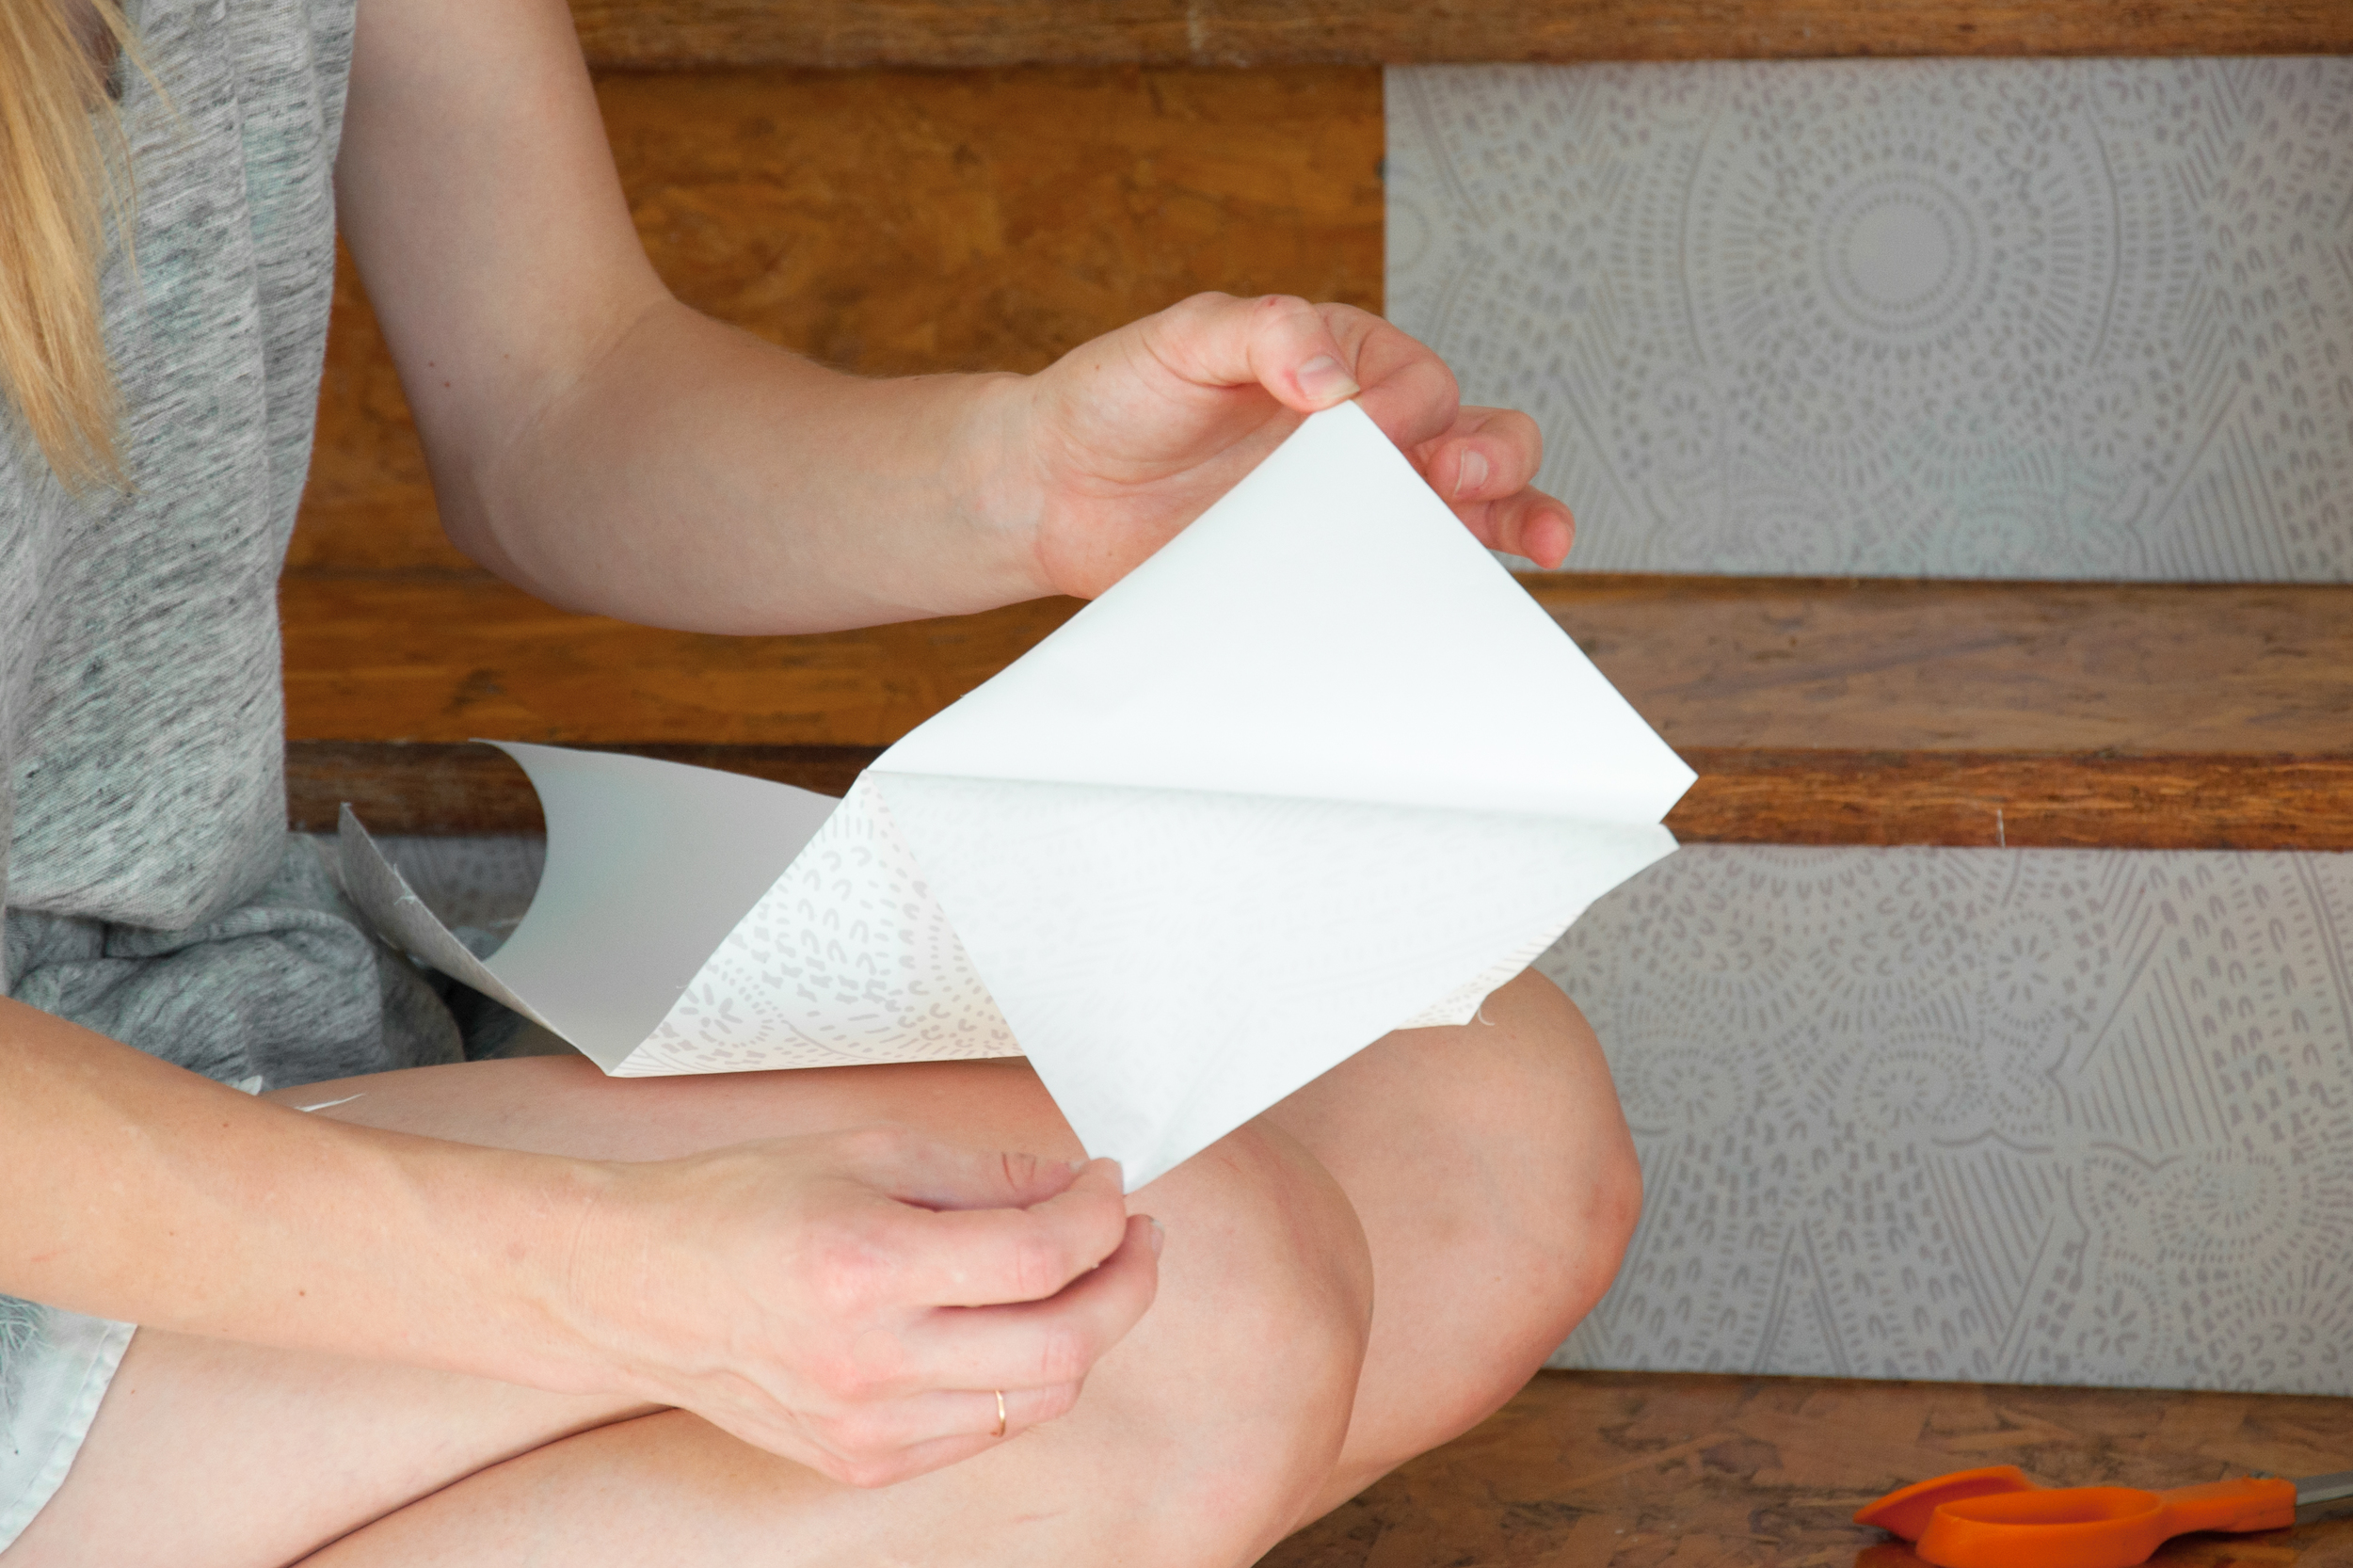
- To keep things organized, I laid out each piece before installing. My wallcovering style has a pretty intricate pattern match, and I wanted to be sure I didn't mix up the pieces.
Step 4: Peel And Stick. BE PATIENT. Here comes the frustrating part.
- I installed my pieces starting from the bottom riser and worked my way up the staircase.
- Tip: most removable tiles are multi-use. This means that if you mess up, just gently pull the piece off and re-apply. I would try not to do this multiple times, but it's going to be fine if you accidently stick something crooked the first time.
- Be sure to apply extra pressure to the corners and work out any bubbles (there won't be many).
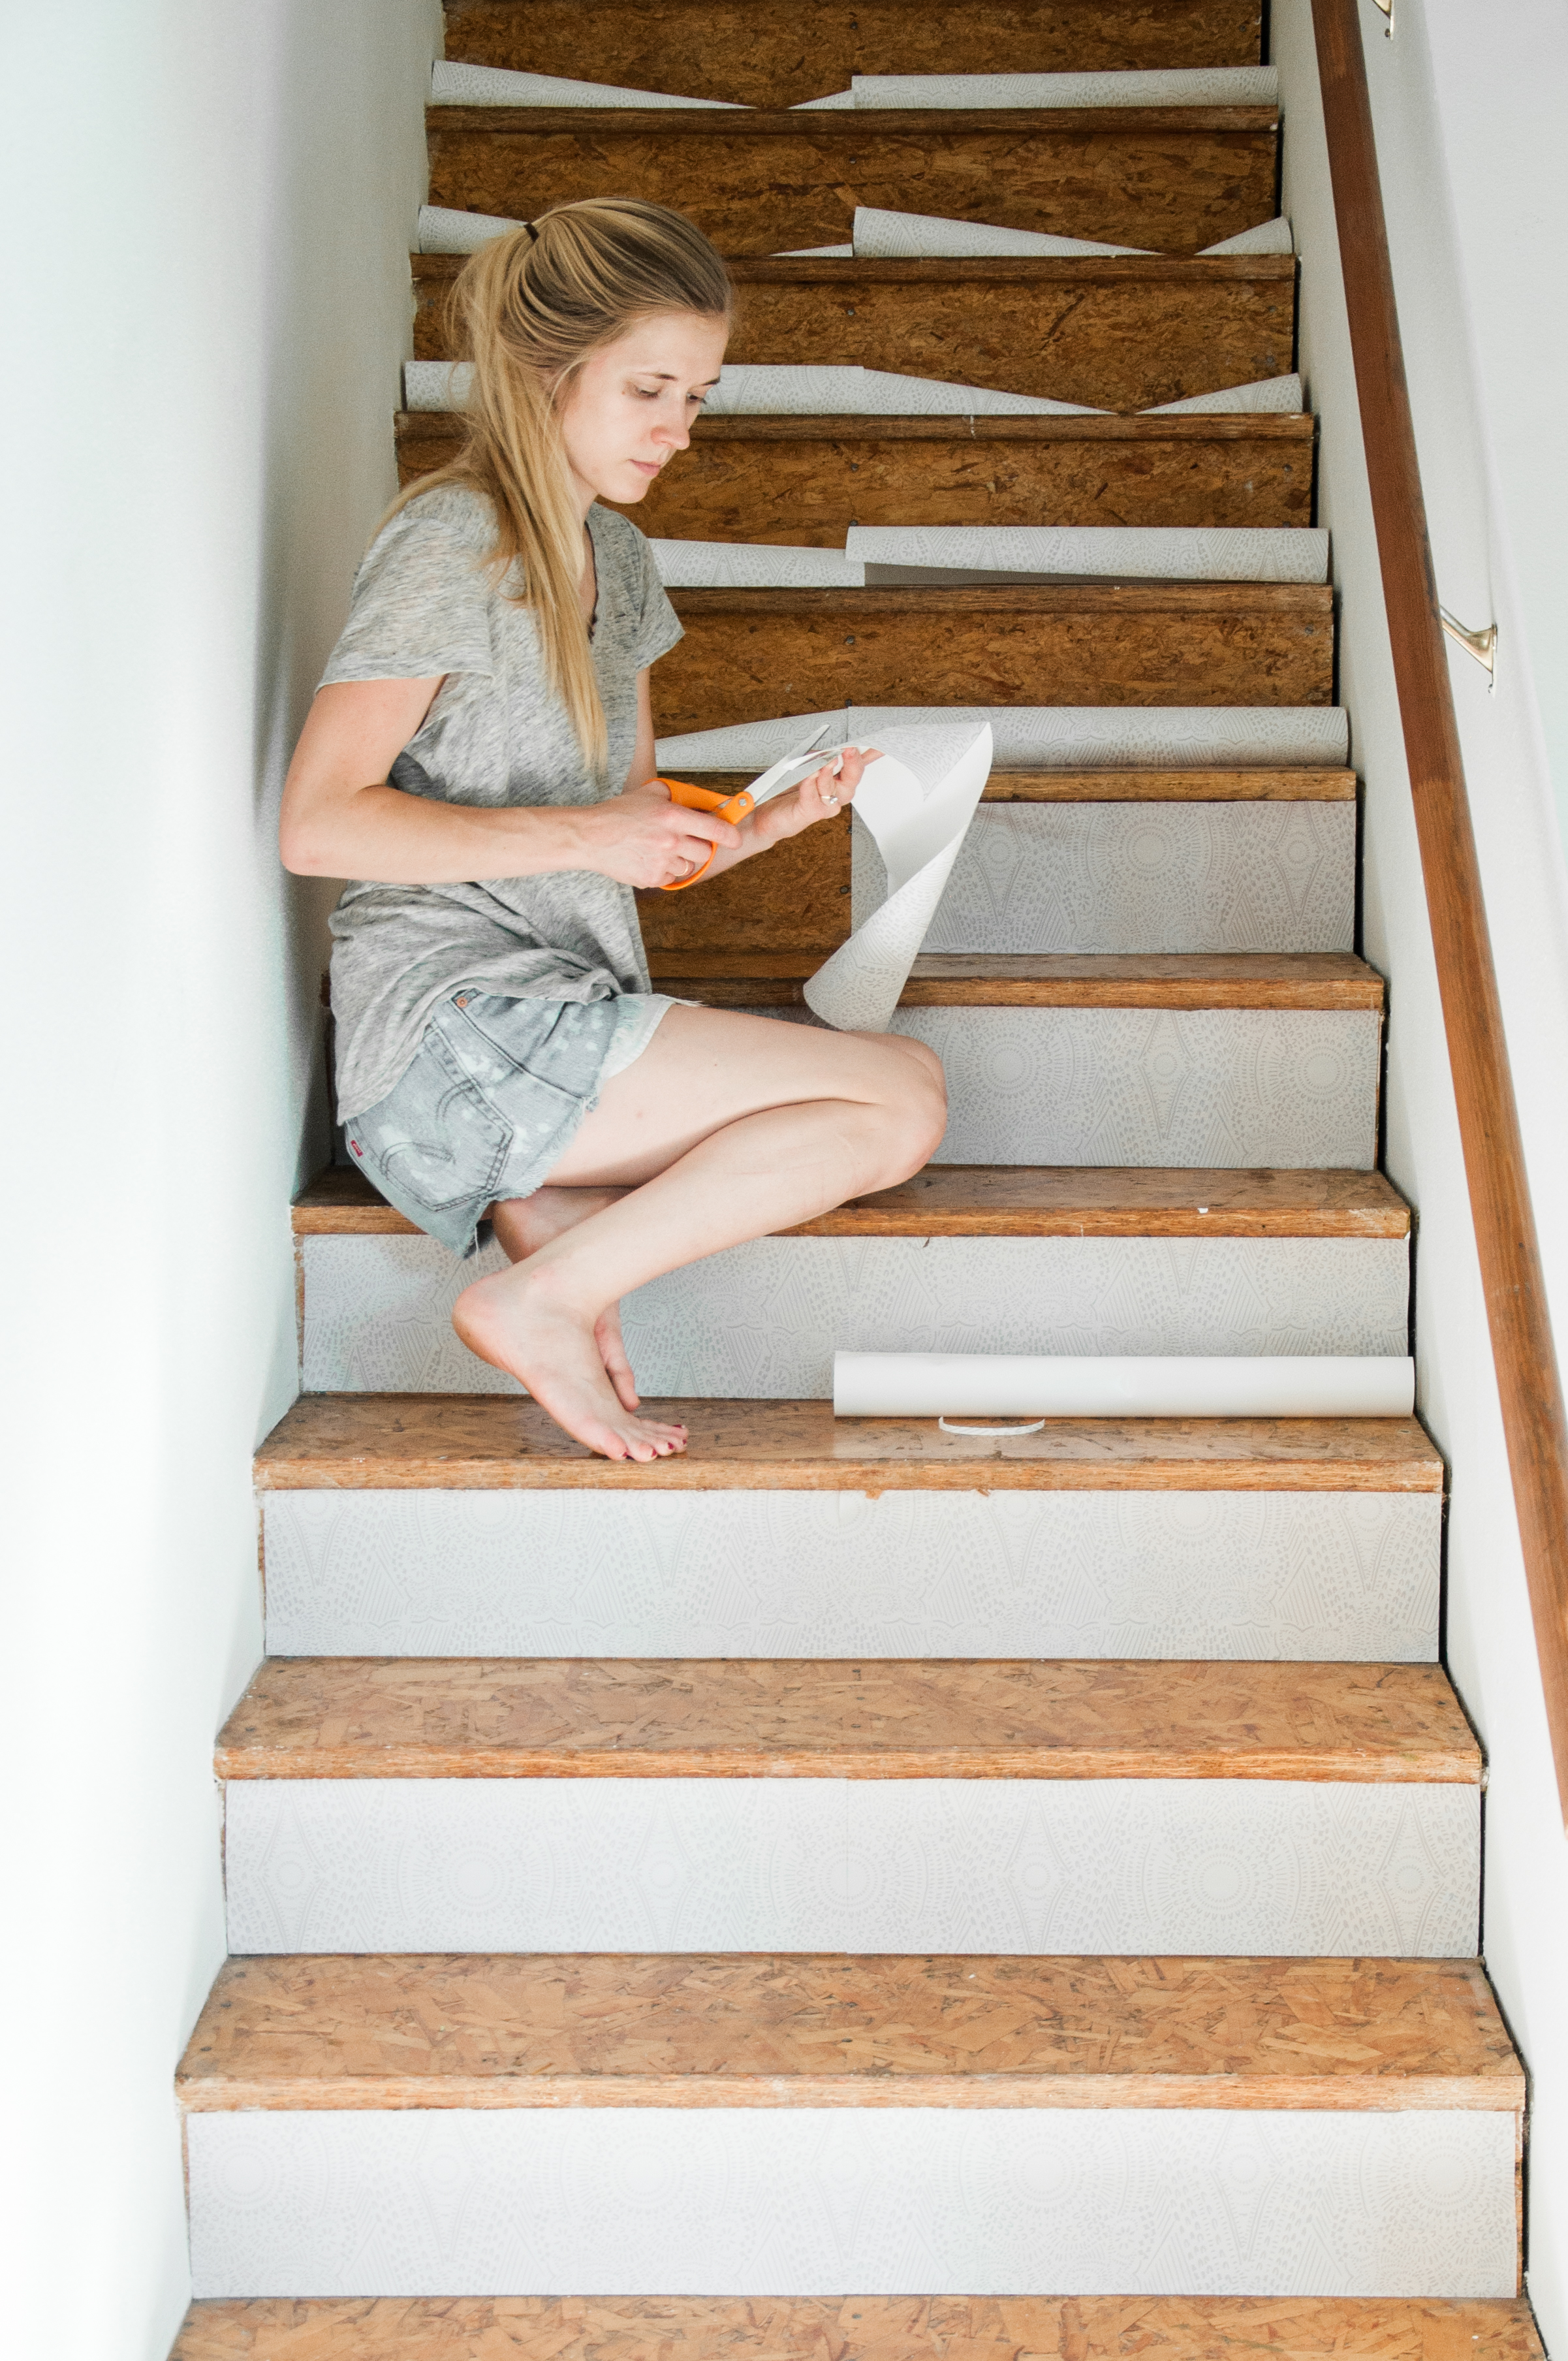
Step 5: Trim As Needed
- Remember that pesky riser that I mentioned? The one that is annoyingly 1/2" shorter than the rest? Keep a pair of scissors handy and trim manually when you get to it.
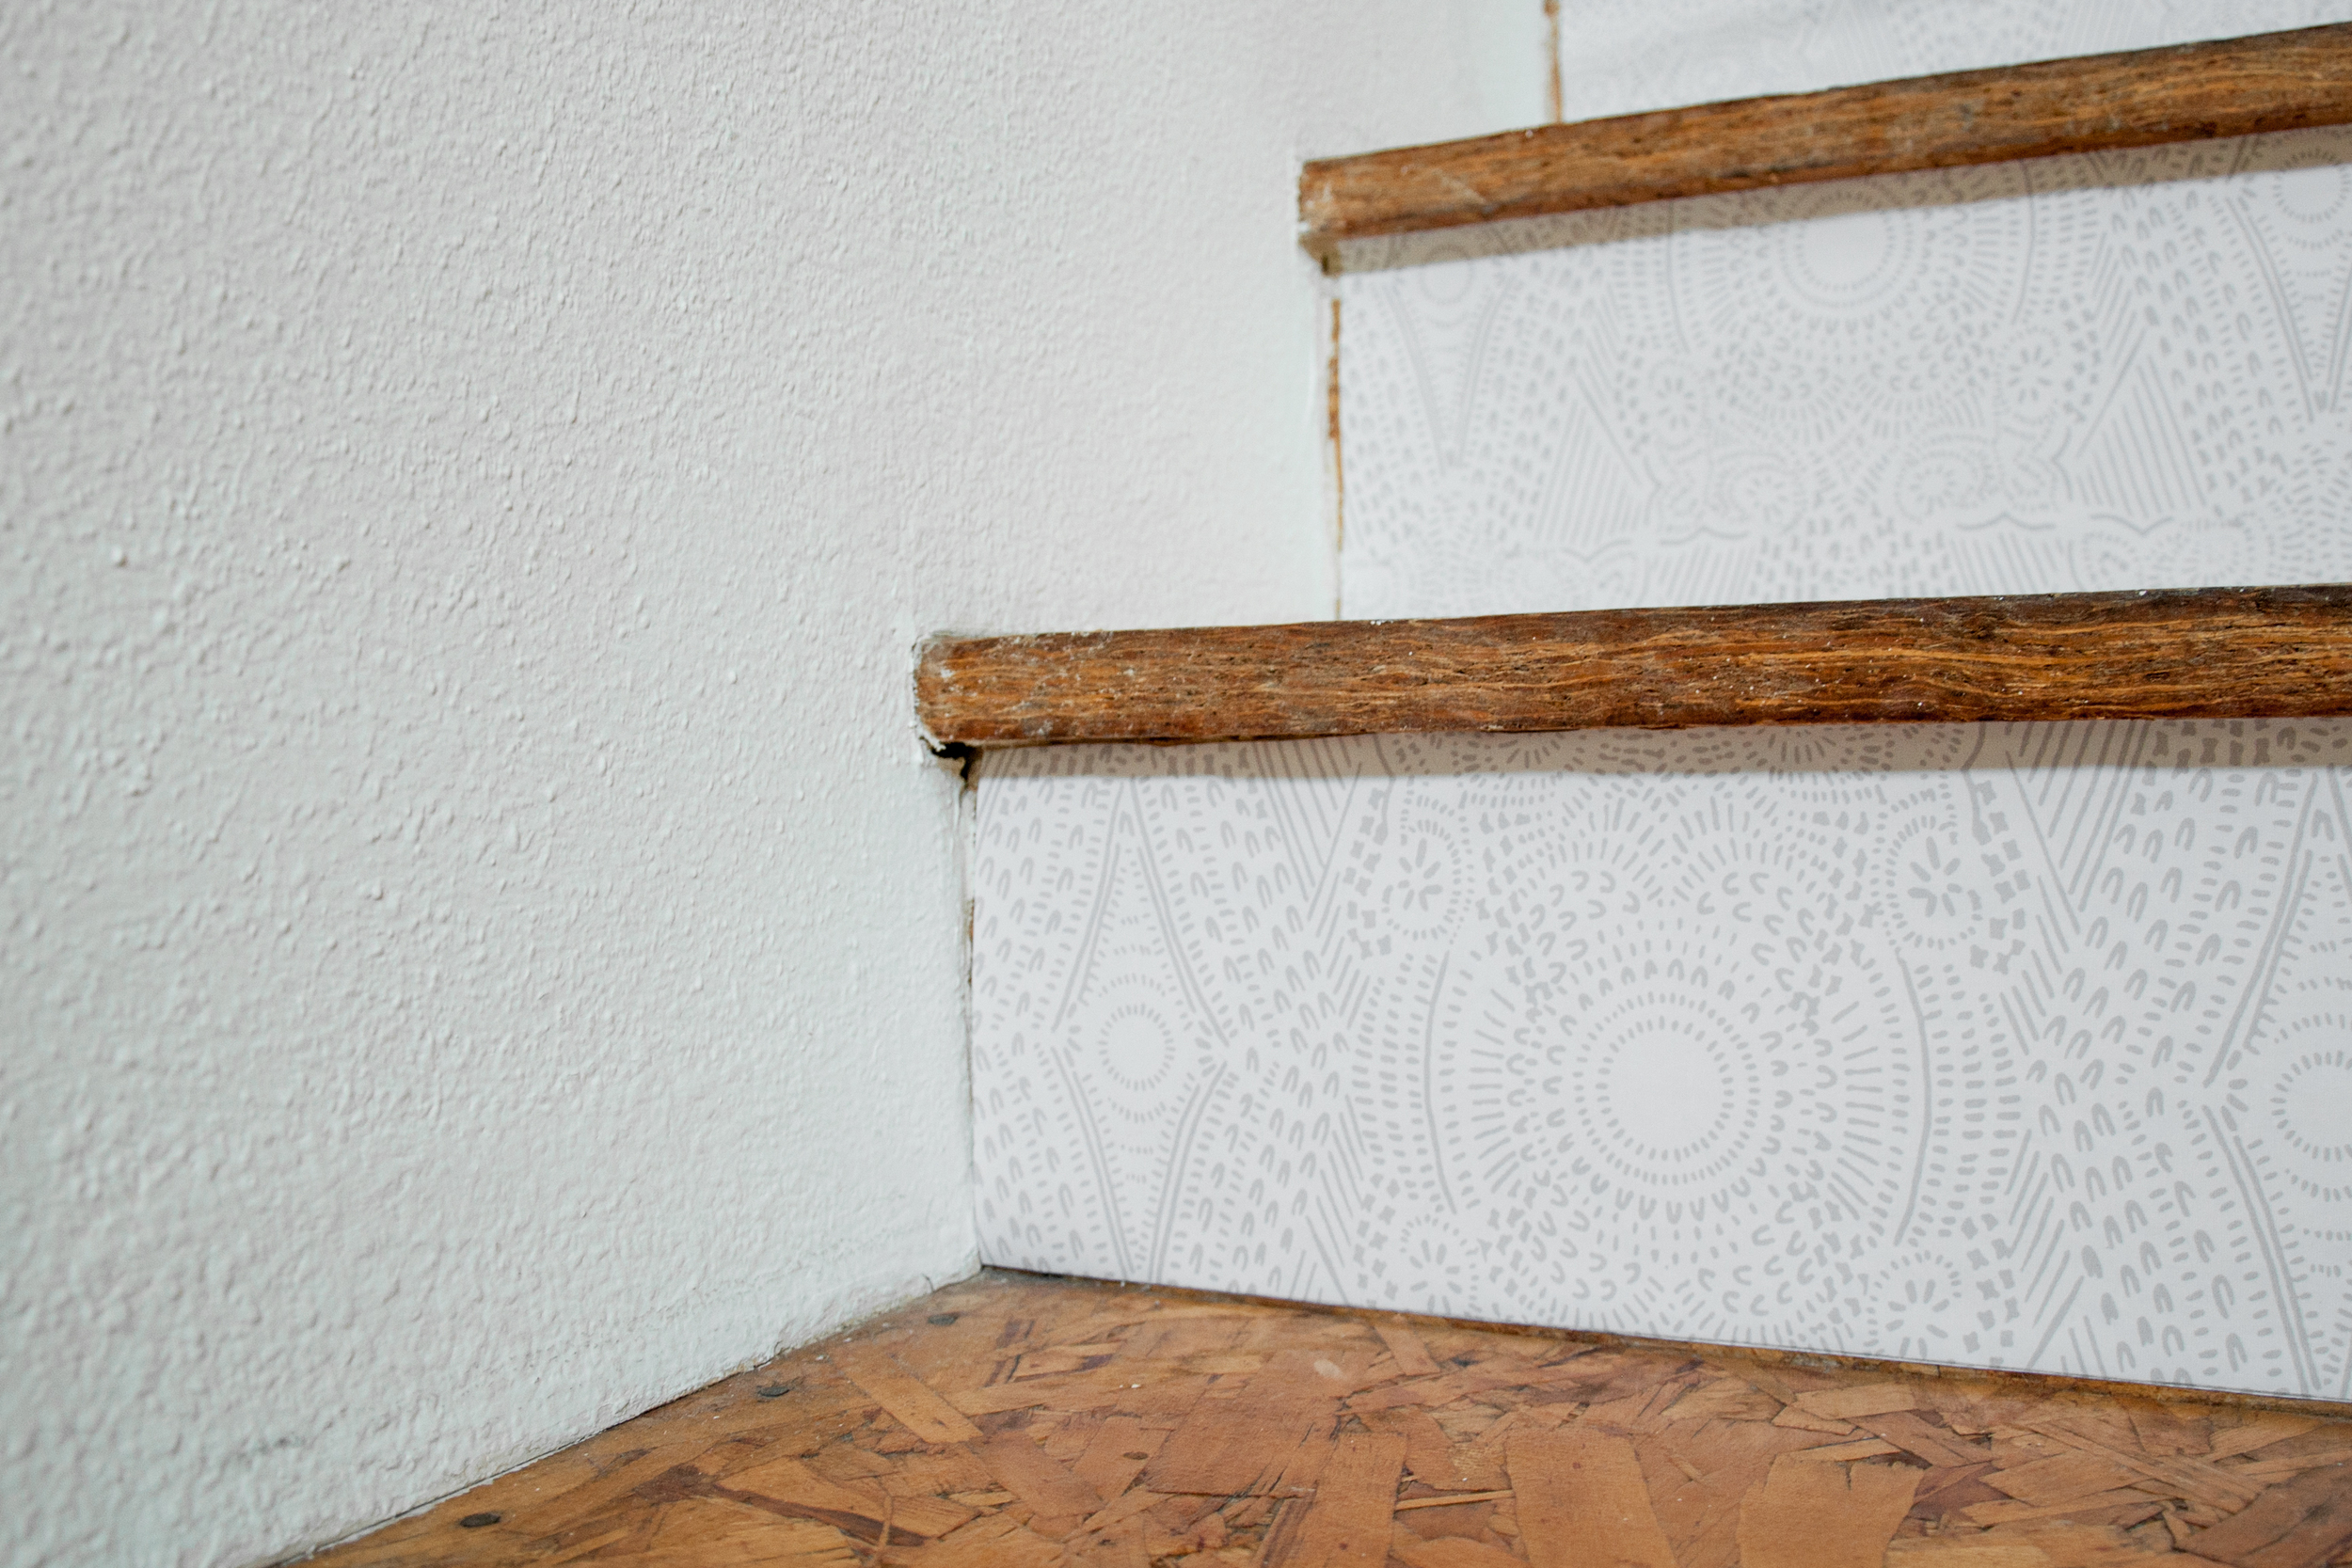
Step 6: Take A Step Back And ENJOY!
What do you think?! It makes a big difference, huh? In my own life, this is definitely one of those drab-to-fab Cinderella stories that I fully intend to recount to our grandchildren. Enjoy!
*All wallcovering was generously provided by Hygge & West.